
A 3DEXPERIENCE Filter is a tool that uses a set of rules to isolate specific components of your assembly structure. Once you’ve established your rules, the resulting filter can be saved to the 3DEXPERIENCE platform as an object. You can then open the filter within SOLIDWORKS, modify components contained within it, and save your work back to the 3DEXPERIENCE platform. Any modifications you make are reflected in the top-level assembly without compromising the overall product structure.
Using this method can be a great way to manage modifications to large assemblies within the 3DExperience platform.
How to Create and Save Filters
Filters can be created in several ways:
-
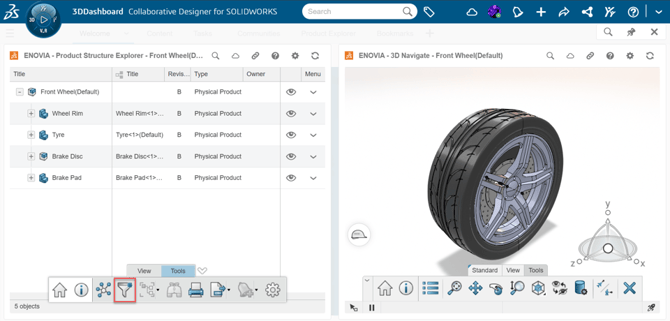
From the Tools menu within Product Structure Explorer (on the 3DEXPERIENCE platform):
-
From the Tools menu within Product Structure Explorer (on the MySession Panel within SOLIDWORKS):

- Click the Filter button to access the Advanced Filter Panel. Here, you can open an existing filter, create a new filter, or copy the settings of an existing filter.
- Under the New Filter section, you can select from four types of Filter rules:
- Selection: Keep and/or remove components based on manual selection.
- Attributes: Filter based on object type, name, maturity state, or other PLM properties.
- Configuration: Choose from defined product configurations.
- Volume: Define a region around components using a bounding box, bounding sphere, or proximity range
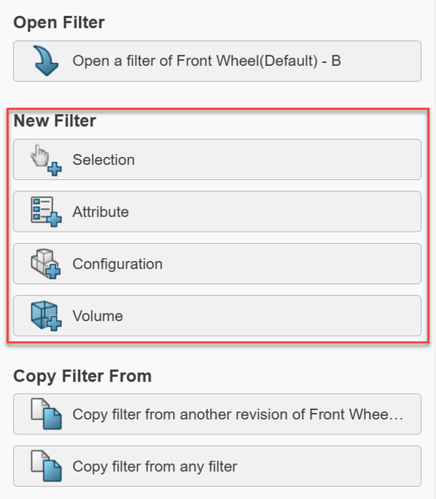
Tip: You can apply multiple rule types in a single Filter, and you can reuse and share the same Filter for design work, collaboration, reviews, BOM checks, and other downstream tasks.
-
For this example, we’ll choose the option to create a Selection Filter.
Once selected, we need to define components of our product structure to either include in our selection or exclude from our selection. We can include objects in our selection by clicking within the Added Node field and selecting nodes (or components) to include in our new filter. Alternatively, we can exclude objects using the Excluded Node field in the same manner.
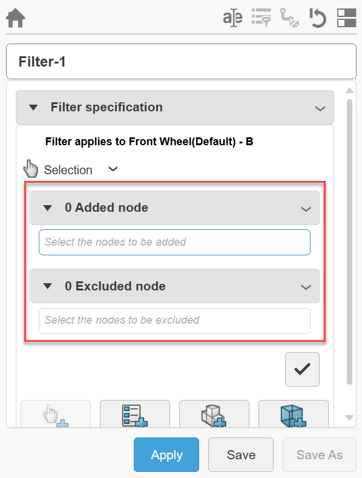
- In the main structure view, select the physical products that you want to include or exclude within the filtered structure.
Tip: You can also click on a part within the graphics window to bring up the Level Selector Tool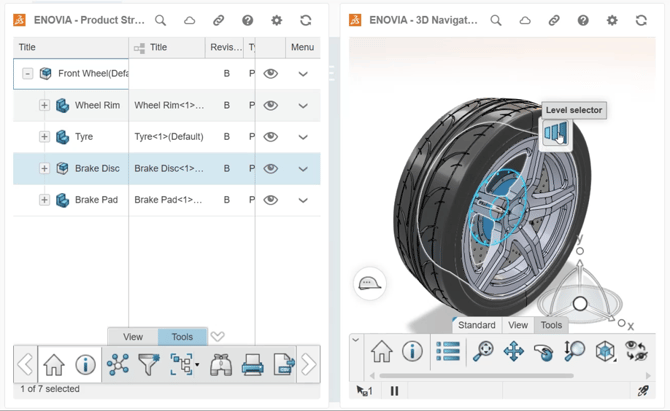
Then, click the Level Selector tool to easily select different levels of a subassembly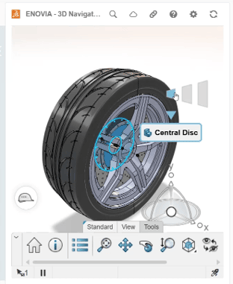
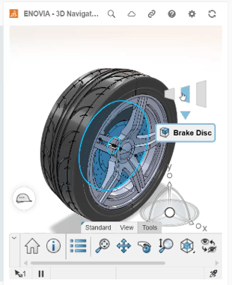
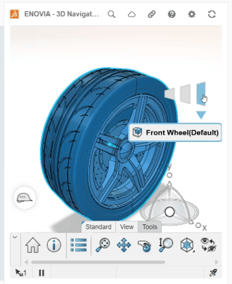
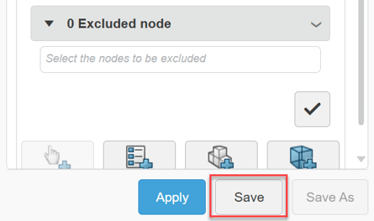
- Once selection is complete, click the Check Mark at the bottom to finish the Selection rule.
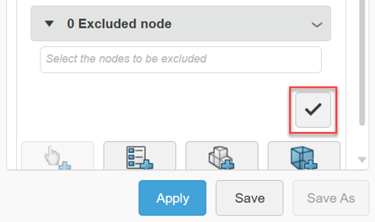
- Click Apply to see the filtered structure.

- Click Save to save the filter to the platform as a component.
How to open Filters within SOLIDWORKS Design
Now that you have created and saved Filters for portions of your assembly, you can open just the portion you need by opening the Filter instead of the top-level assembly. SOLIDWORKS Design will open only the components defined by the rules of the Filter. This will allow you to load smaller sections of your assembly more quickly, while the full assembly context remains intact on the platform.
A Filter is also a separate database object, meaning you can find and open it just like any other object on the platform.
There are several ways to search for a Filter:
- On the 3DEXPERIENCE platform, using 3DSearch or an app such as Product Explorer or Bookmark Editor.
- In the MySession panel inside SOLIDWORKS Design.
- In SOLIDWORKS Design, using File > Open > Open from 3DEXPERIENCE.
Once you have located the Filter, you can drag and drop it into the working area of SOLIDWORKS Design to open it.
Indicators of Working with a Filtered Assembly
When you open a Filter inside SOLIDWORKS Design, there are indicators to show you are working with a filtered product structure rather than the complete assembly.
-
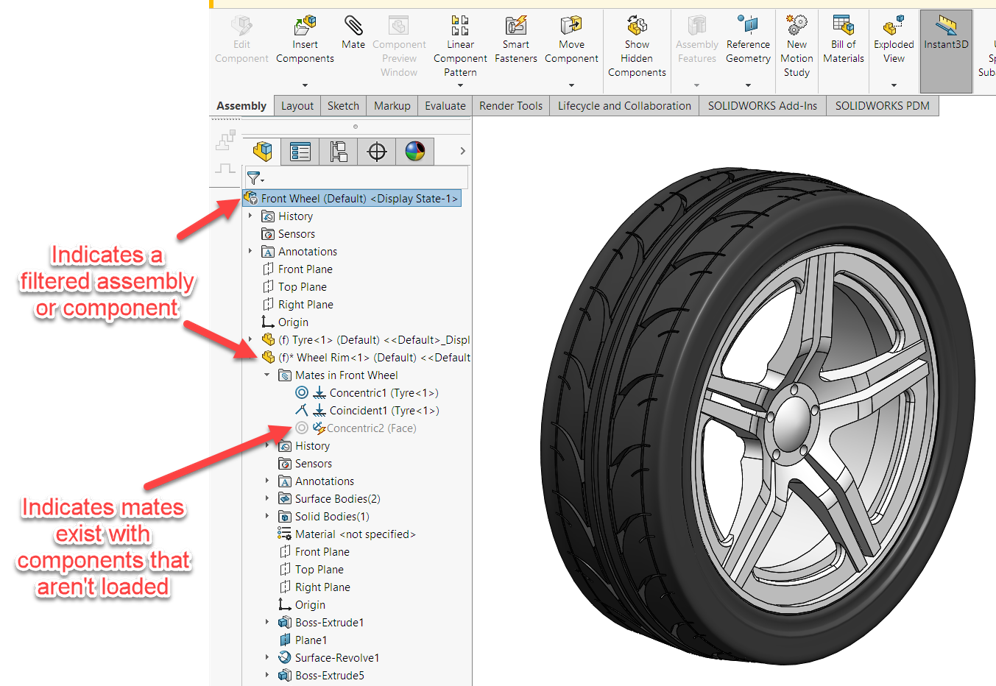
A filtered assembly banner appears above the CommandManager

- The top-level assembly has a filter icon in the FeatureManager design tree
- Sub-assemblies that have components filtered out are marked with an asterisk (*)
- Mates that are not resolved due to filtered-out components also have a different icon.
- You cannot make changes to these mates.
- You can create new mates with components that are loaded or new components that are inserted.
- You can edit mates with components that are loaded.
After saving edits you make to 3DEXPERIENCE, the changes will be reflected in the top-level assembly. Any added components will respect the assembly structure.
Working with Filtered Assemblies
While the assembly is filtered:
- You can still create, open and edit Design Tables.
- You cannot create new Physical Products or Product Representations in ConfigurationManager.
- You cannot view another Physical Product or Product Representation in ConfigurationManager.
Creating Drawings from Filters
Once your Filter is saved to the platform, you can also create drawings from the Filter. This can be useful for creating BOMs, cut lists, or part lists for specific needs, as well as quick high-level sheets for design reviews, inspection, or service documentation, all without loading the whole assembly. Drawings that are related to the Filter will be updated automatically when the Filter is updated.
- Open your saved Filter in SOLIDWORKS Design and create a new drawing like you typically would.
Tip: Use the Relations app to view the relationship between objects on the 3DEXPERIENCE platform.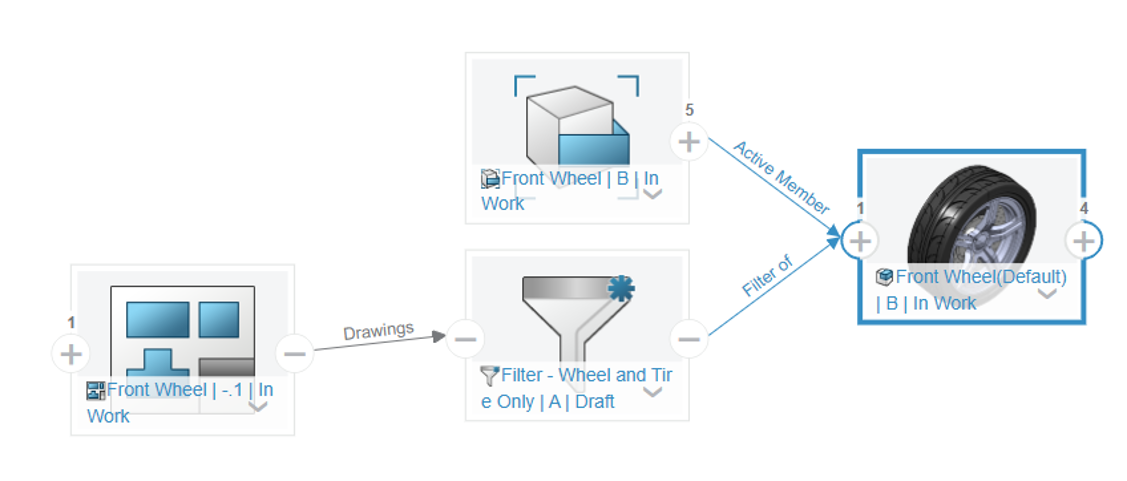
Best Practices for Setting Up Your Data for Filtering
The value of Filters depends heavily on the quality of the data behind them. A small investment in setup can pay off each time your team creates or uses a Filter.
Define Attributes That Work for You.
- Attributes can be the foundation of powerful, reusable Filters. Leverage the default attributes that are available on every object, such as Description, Approved By, Maturity State, etc.
- Set up custom attributes that align with your organization, product, or project. Refer to the Attributes Mapping for SOLIDWORKS Design SolidPractices guide on how to map your custom attributes.
- Populate these attributes consistently as components are created. Attributes that are filled in reliably allow anyone, from designers to procurement, to isolate exactly the components they need with a single Filter.
- Attributes only work as filter criteria when everyone uses the same values in the same way. Agree on a controlled list of values (for example, a fixed set of Discipline names) and document it. Inconsistent entries such as "Hydraulic", "Hydraulics", and "HYD" will fragment your filter results and undermine trust in the workflow.
Establish Standards Across the Team
- Define a naming convention to stay organized. What are you filtering by? What is the Filter for?
- Write meaningful descriptions when saving a Filter. Include a description that communicates the scope of the Filter. A good description lets teammates decide whether a Filter fits their needs without needing to open it first. For example:
- “Excludes fasteners and purchased parts”
- “Includes steel frame and cross members”
- Remember, as components on the platform, Filters will have their own maturity states. These states will control their visibility.
- Keep a Filter in a Draft state if it is for your own use.
- A Filter must be in an In Work state to be visible to other users.
- Filters can also be Released and kept with your design documentation.
- There is also an option to set In Work as the default maturity state in the Collaborative Spaces Configuration Center. Consider enabling this if your team's Filters are generally intended to be shared.
Part 2: Understanding Filter Rule Types – Coming soon