
The next step after installing the SOLIDWORKS PDM Client on a computer is setting up a Local Vault View, which enables users to access the PDM vault via Windows File Explorer.
With a few client machines, using the View Setup process to create Local Vault Views takes a few minutes per machine. Organizations with a large number of clients can save time by automating the setup of Local Vault Views with a File Vault View Setup File (CVS). The CVS file can be generated via the View Setup wizard executable and a specific command-line argument (switch). When the file is delivered to a client system, users simply double-click it, and the Local Vault View is generated automatically.
Benefits of using a CVS file- Save time by distributing it to multiple client machines.
- Consistent Local Vault Views on each client machine.
- Can run silently (details at the end of this article).
The first step in creating a CVS file is to launch the View Setup wizard with the “/a” switch on a system that does not already have a local vault view for the specified vault. If the machine already has a local vault view, erase it before proceeding.
Right-click the Windows Start icon, then select Run.
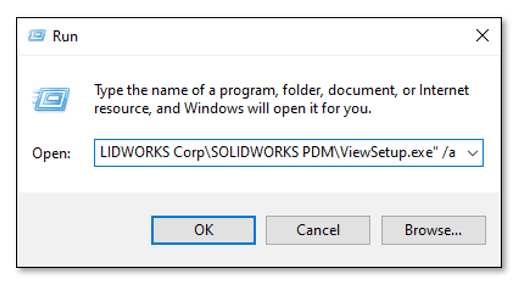
In the Run dialog, enter the text exactly as shown below, including the quotation marks. This text includes the path to the ViewSetup.exe. The example text below includes the path for the default installation. If your installation is not located in the default location, then replace the text accordingly.
“C:\Program Files\SOLIDWORKS Corp\SOLIDWORKS PDM\ViewSetup.exe” /a
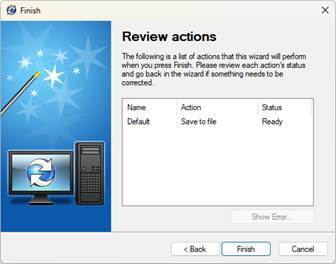
When the View Setup wizard is executed while including the trigger /a, the Action column on the Review actions screen will display ‘Save to file’ instead of ‘Create local view’ as shown below.

Click Finish to open the Save dialog, and then navigate to a location and enter a name and for the CVS file, then click Save. You are then returned to the View Setup wizard and the Status column displays “Completed”, finally click Close.
Open the CVS File for Review
The CVS file is ready to run, though it can be opened and edited in Notepad to modify the information to work for a different vault or change the location of the Vault View.
Right-click the CVS file in File Explorer and select Open with > Notepad (or any text editor you prefer).
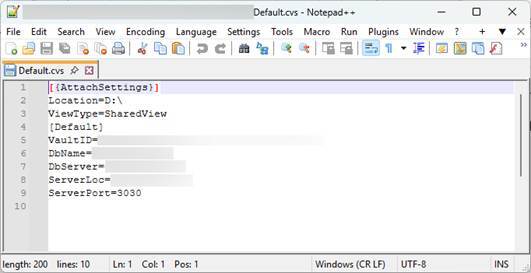
Location: Folder where you want the view to be created; the default is typically C:\ for shared views and should be placed in the user folder for private views.
ViewType:
- Only for me (Private View) - The local view is accessible only to the Windows profile that is logged in. Use this option when multiple users use this system. Place the local vault view in a user folder that is accessible to the logged-in profile.
- For all users on this computer (Shared View) - The local view is accessible to all Windows profiles on this system (preferred). The logged in user must have local administrator rights to use this option because it requires updating the local system registry.
[VaultName]: Update text inside the brackets with the file vault name (case sensitive). Example [Default]
VaultID: Update with the file vault ID. You can find the vault ID in the PDM Administration tool, right-click a vault and select Properties (Exclude the { } brackets shown in that dialog)
DbName: The vault database name (case sensitive)
DbServer: The SQL server name (typically the name of the server, but can differ). Please coordinate with either your DBA or IT professional)
ServerLoc: The archive server name (name of the server)
ServerPort: The archive server port (default is 3030)
Running the CVS File
1. Copy the CVS file to any location on the client machine.
2. Double-click the CVS file.
3. The View Setup wizard will launch and display Action: Create local view and Status: Ready.
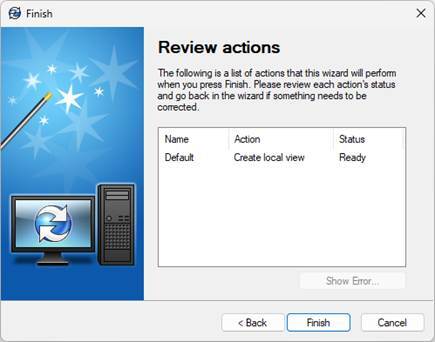
4. Click Finish to create the vault view. There will be a prompt to log into PDM to complete the process if this is a new vault view.
The View Setup wizard now displays "Status: Completed" and then click Close.
The Vault View is ready to use!