This document includes how to download, install and configure the firewall for the SolidNetWork License Manager
Before we get started – You’ll need the following
- Computer must meet minimum requirements as defined in the SOLIDWORKS System Requirements
- Administrative access
- Ability to add Firewall / Antivirus Rules
- You will need a SOLIDWORKS Customer Portal login. If you do not have one, check out our post on Creating a SOLIDWORKS Account.
Downloading required installation files
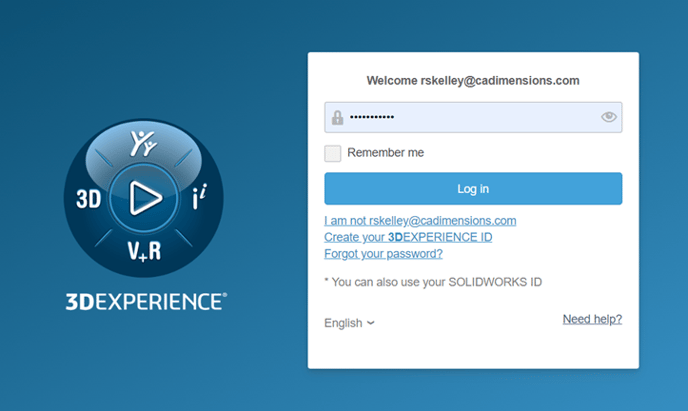
- Log into the SOLIDWORKS Support Download page https://www.solidworks.com/sw/support/downloads.htm
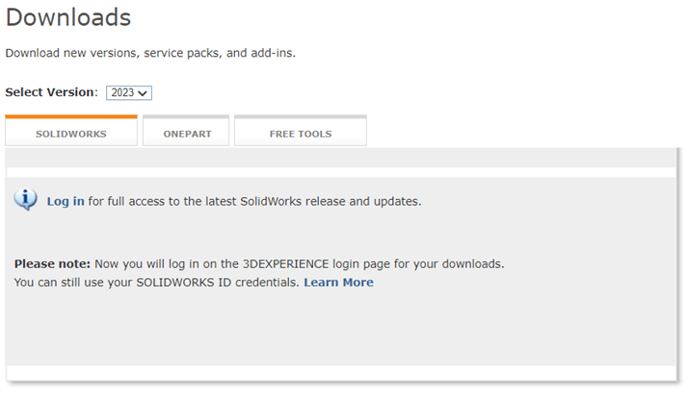
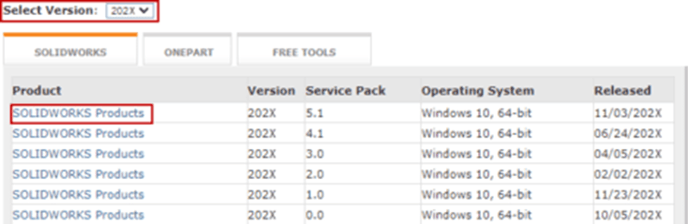
- Select the “SOLIDWORKS Version”and then click “SOLIDWORKS Products” for the Service Pack you wish to download
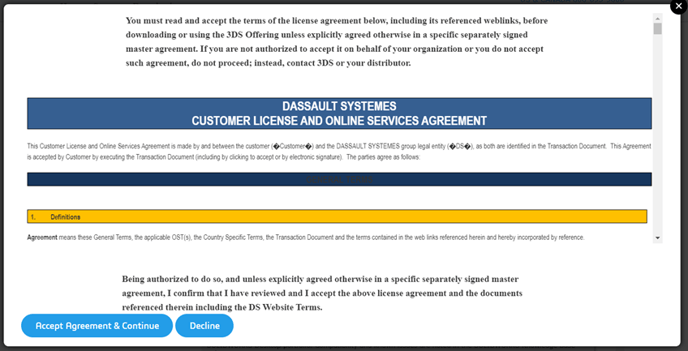
- Accept the Customer License Agreement
Installing the SolidNetWork License Manager
- Locate SolidWorksSetup.exe (This will typically be in your Windows “Downloads” folder)
- Right click on “SolidWorksSetup.exe” and choose “Run as administrator”
- Choose where to extract the files. Be sure to check “When done unzipping open:” to auto launch the Installation Manager
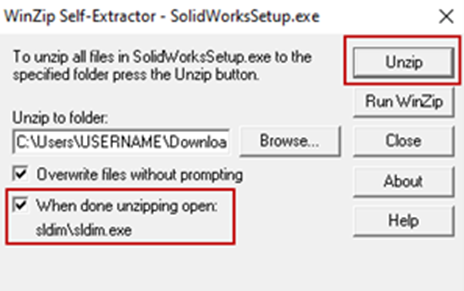
- Choose “Install SolidNetWork License Manager”

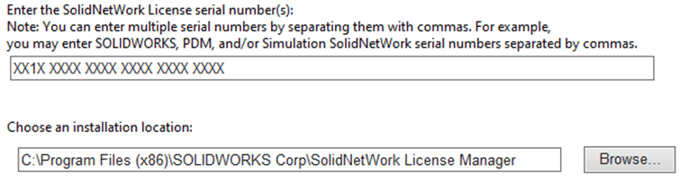
- Enter your Serial Number(s) Note: All network Serial Numbers will have a “1” for the 3rd digit.
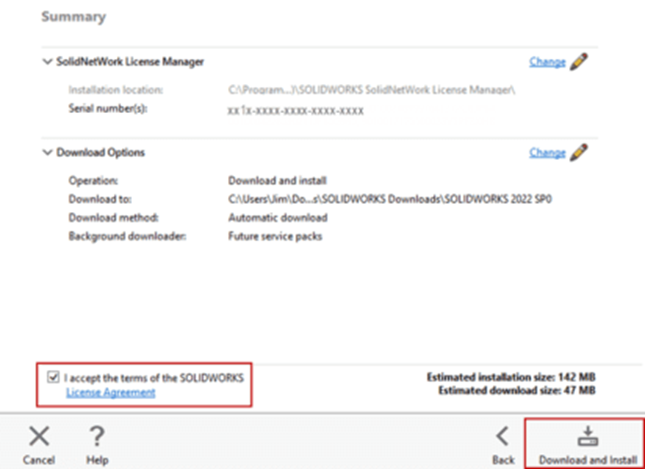
- If all looks correct on the Summary, accept the License Agreement and select “Download and Install”
 Activation
NOTE: if your licenses are currently active on another computer you will not be able to activate. “Activation count exceeded will be displayed”
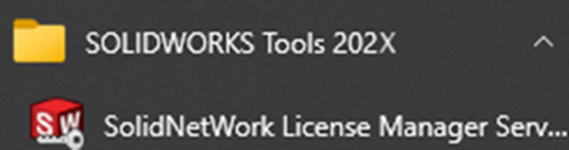
- Open the newly installed version of the SolidNetWork License Manager from the Windows Menu.
- SOLIDWORKS Activation will automatically appear on first launch.

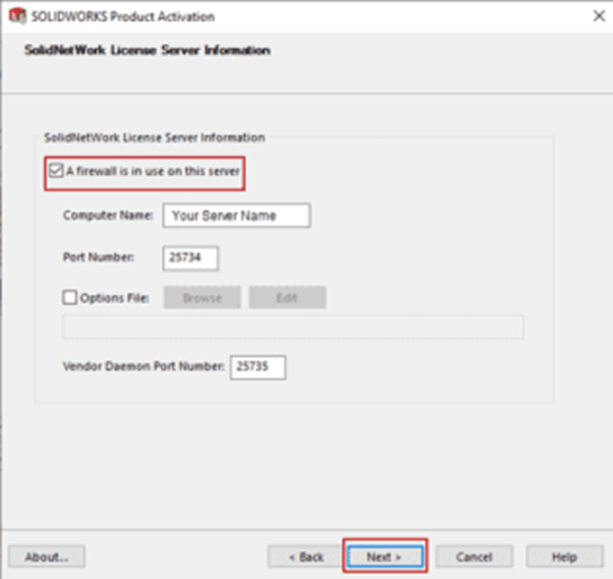
- Check “A firewall is in use on this server” **Take note of the “Computer Name”** you will need this information to install SOLIDWORKS on the client PC
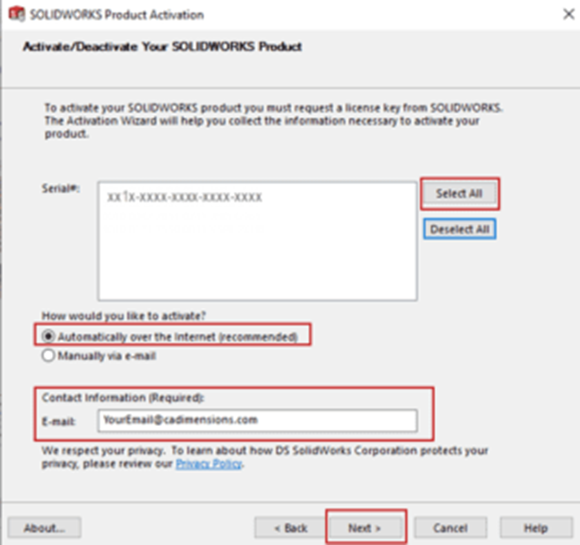
- Activate: “Select All” serial numbers, choose “Automatically over the Internet” and enter your “E-mail”
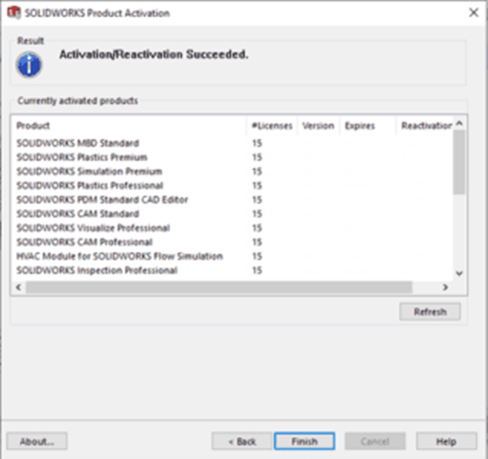
- Review activated license
Firewall Exception – Windows Defender
We will be adding lmgrd.exe and sw_d.exe to the allowed programs list in the Windows Firewall settings
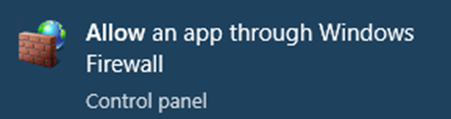
- Search the Windows Start menu for “Allow an app through Windows Firewall
- Select “Change settings” then select “Allow another app…”
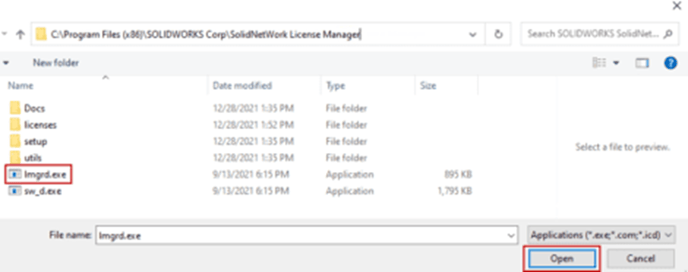
- Browse to the installation location of the SolidNetwork License Manager. (Default location is C:\Program Files (x86)\SOLIDWORKS Corp\SolidNetWork License Manager)

- From the installation location, select “lmgrd.exe” and click “open”
- Select “Add”

- “Flexera” will be added to the list of allowed programs

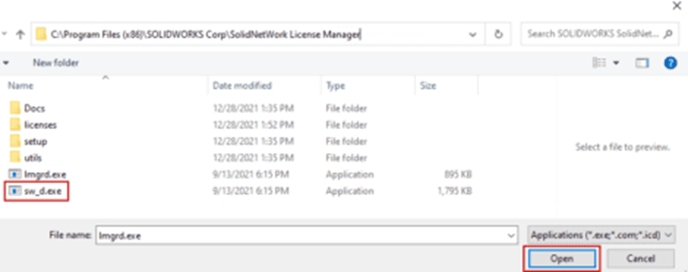
- Repeat steps 2 & 3 to browse for another app
- Select “sw_d.exe” and repeat steps 4 & 5
- “sw_dn” will be added to the list of allowed programs

Next Steps / Summary
You have successfully installed the SolidNetWork License Manager. When installing SOLIDWORKS on a client you will need to enter the Port@Servername shown in Step 3 of the “activation process”
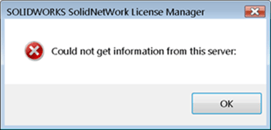
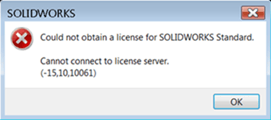
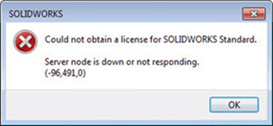
If the Client is unable to connect with any of the errors below, please see our Troubleshooting Network License Connections post
Not working like it should?
If things didn’t go as planned when registering your account, please contact CADimensions Technical Support for further assistance.
If you have an existing case, please contact the Application Engineer you are working with; otherwise submit a new case online.