
Download this guide here
Uploading your 3D CAD files to your 3D Experience Platform
This is a guide for Connected and SOLIDWORKS UES users that are looking to upload their 3D CAD files to the cloud to collaborate, and work from anywhere.
Before we get started – You’ll need the following
- SOLIDWORKS Connected or SOLIDWORKS UES license.
- Business Innovator (SWYMER) Role
- Industry Innovator (Access to date) Role
- Where to find the upload buttons
When you want to upload your 3D CAD files to the cloud, they must be uploaded through SOLIDWORKS. Similar upload methods that you may see will not work; the files will be uploaded as generic “files” not 3D CAD Data.
You first need to create your files. I have a grill assembly here that I want to upload to my bookmark. I have made the part and the bookmark ahead of time...

Here’s a screenshot of the Bookmark I want to upload to. You can create this by right clicking and selecting “New Bookmark” or use the top bar.

There are four main ways to save it from SOLIDWORKS. Two in the MySession panel. You do not need to perform all of these. You can just select your favorite method.
- By right clicking the file and “Save with Options”

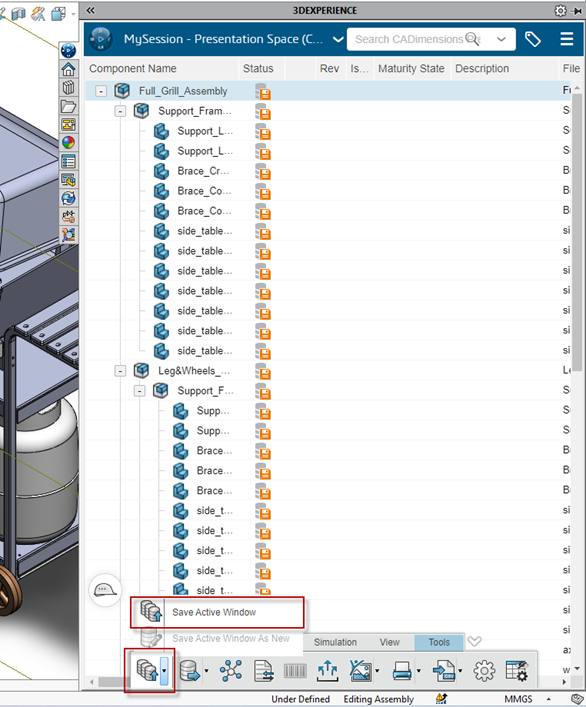
- By selecting “Save Active Window” on the bottom bar of the MySession Panel
- Note: This will save all active files in the window.
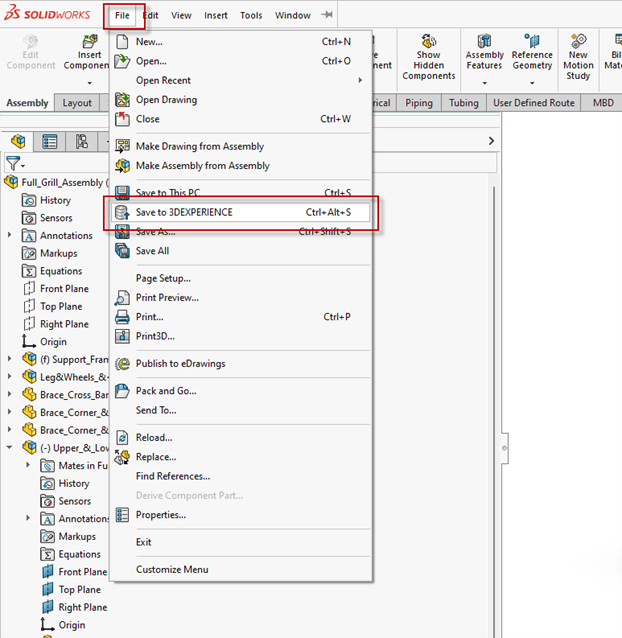
- From File > Save to 3DEXPERIENCE
- From the Lifecycle and Collaboration tab.
- Note there are two options. Save with Options must be performed first before using Add to Bookmark. Add to Bookmark will be greyed out before you save it.
- Another important thing to note here is that if you are using UES, your version of SOLIDWORKS must be the latest version in order to see these options.

2. Save Dialog Box
Inside of the Save dialog box are a few options. Since this is just about uploading for the first time, not too many of these options matter at this stage. I will briefly discuss the other options. Some of the screens may be slightly different depending on your method. I am using method 1.2.

In order of importance at this stage:
2.1. Save
This checkbox is to select the files to be saved. When importing for the first time, all of these are selected when dependent on the file being saved.
2.2. Status
All statuses on new objects will be “New”. You will see these will become “Locked” and “Unlocked” once saved. This is how you “claim” your file so no one else can edit it while you work on it.
2.3. Bookmark
This is the Bookmark destination/where it is currently saved. We need to select it still so, we will select it in the top left. Drill down to you desired destination.

Then press “Apply to All”.
This will update the Bookmark field for all items. You can select individual files and destinations; however, I just want everything in one Bookmark.

2.4. Revision, Revision Comment, New Revision Columns
I am combining these three columns here. Revision is fairly obvious; it tracks the revision. You can increment this by select “New Revision” when saving it again later. You cannot do this in files you import the first time. When you are saving it again later, you can check this box, leave a comment, and it will show the current revision and what it’s being updated to.
2.5. Maturity States
Once you start implementing your Lifecycle Maturity States (“LMS”, similar to Workflow States in PDM), the status of the LMS will display here. The default maturity state is “In Work”, these will change to that once saved.
2.6. Collaborative Space
This is the collaborative space you are saving to. See our document on collaborative spaces for more info.
3. Finally saving
Go ahead and press save at this stage. It should upload to the platform now and you will see the files in your Bookmark.

Not working like it should?
If things didn’t go as planned when registering your account, please contact CADimensions Technical Support for further assistance.
If you have an existing case, please contact the Application Engineer you are working with; otherwise submit a new case online.
Check out this guide on how to upload your 3D CAD files to the 3DExperience Platform. This document gets in detail all of the ways you can initially load the documents in.