
1. Locate the Toolbox Folder
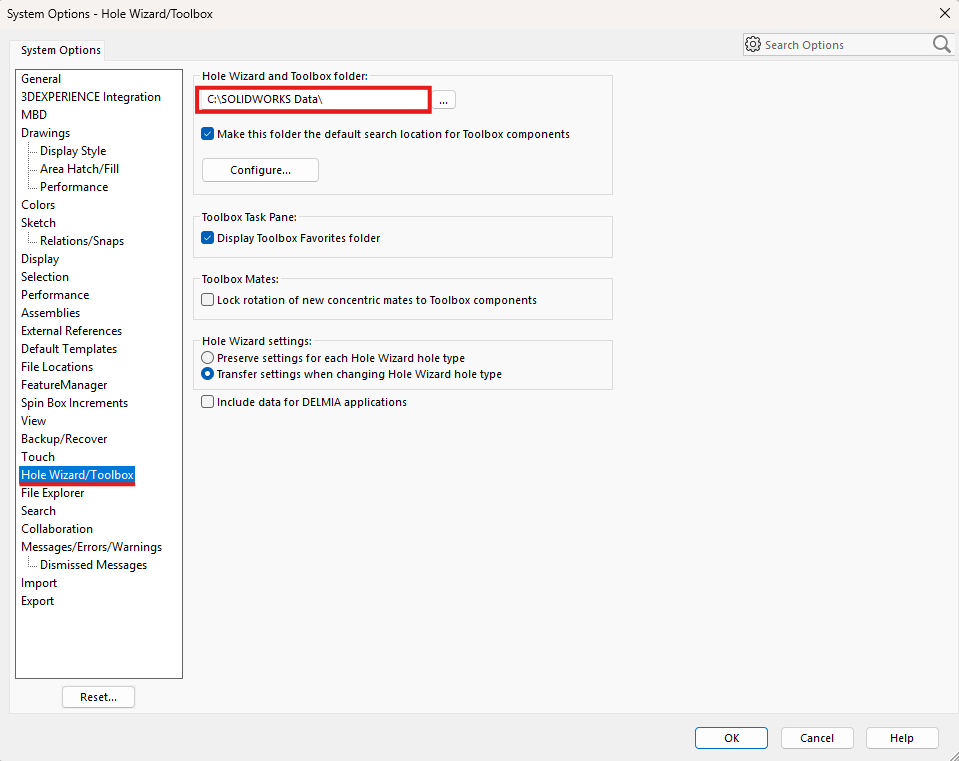
If you don't know the exact location, inside SolidWorks go to Tools > Options > System Options > Hole Wizard/Toolbox. In the box beneath "Hole and Wizard Toolbox folder" will be the location of your Toolbox.
2. In File Explorer, navigate to your Toolbox location and look for the the file named "ToolboxFiles.index" (It might be nested in the "browser" folder C:\SOLIDWORKS Data\browser)
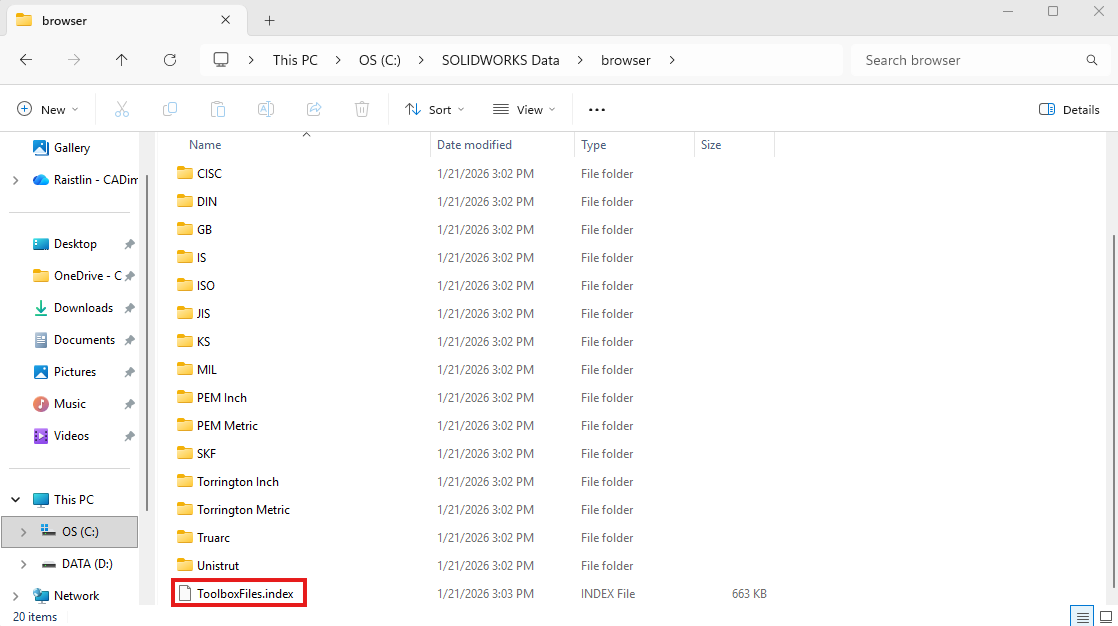
Cut and Paste the .index file out of its current location. (Tip: Pasting it to your desktop a quick and easy) If you choose to Copy and Paste, make sure to delete the original file from source folder.
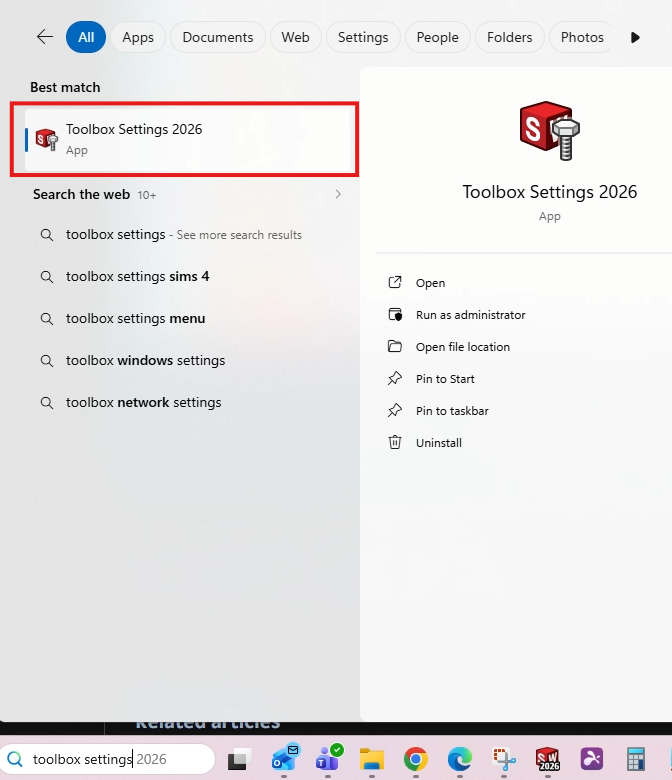
3. Go to Search on the desktop taskbar and search Toolbox Settings 20xx and launch the app
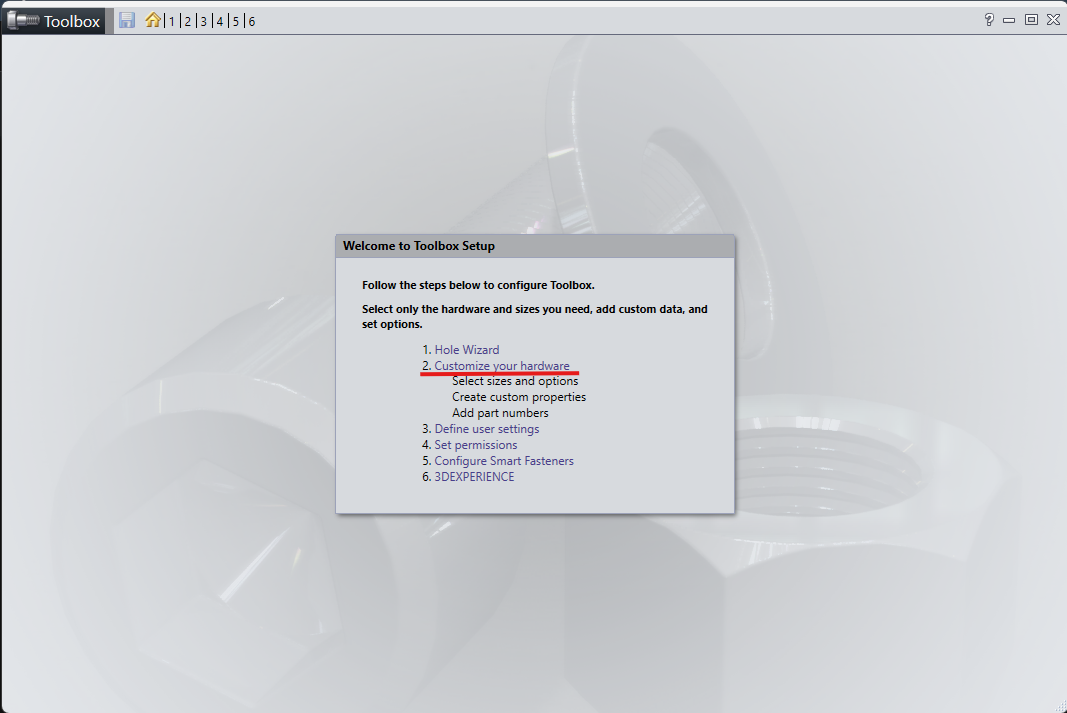
Select Customize your hardware. It may take a little while to create a new index file. Once the process is complete, close the Toolbox Settings window.
Note: For SOLIDWORKS PDM, make sure to check-in the entire Toolbox folder. Also remind other users to clear their local caches and get the latest version for the Toolbox folder.
Once completed, you will be able to see all files and folders when browsing the toolbox.